How to Hang Gallery Frames with Knobs
/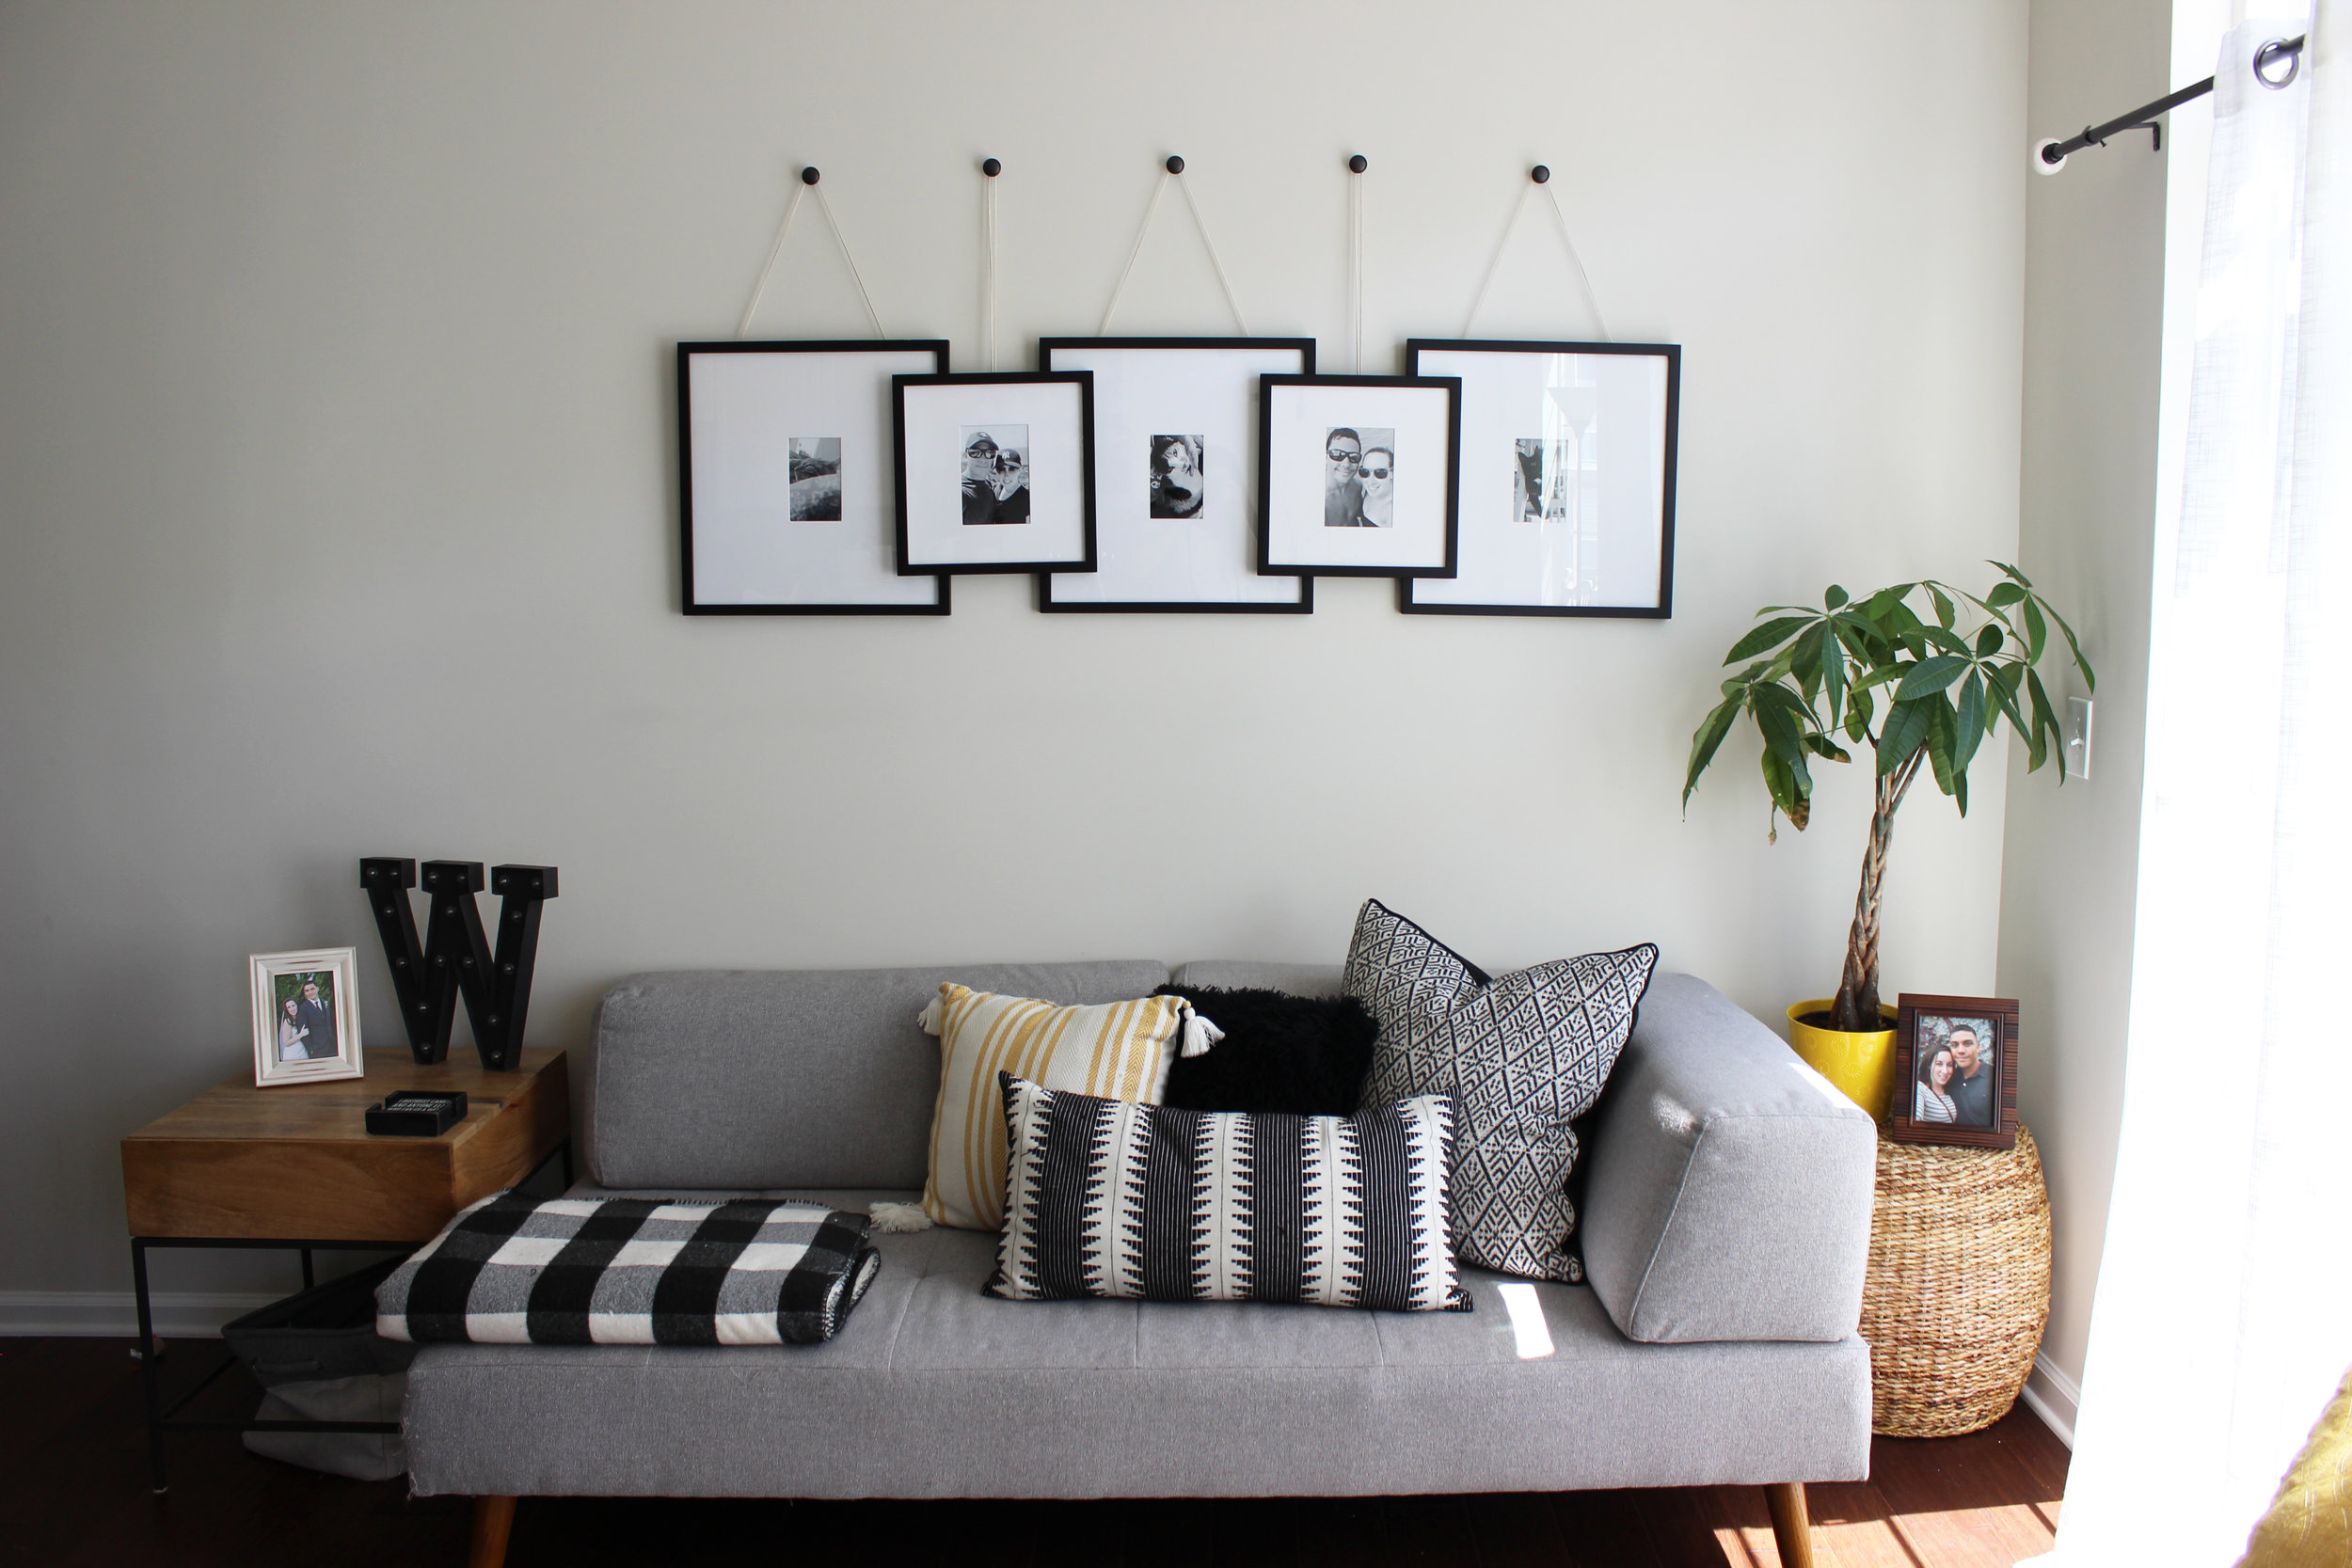
I’m a huge fan of hanging our family photos. So much so that I have a ton of frames lying in wait to be hung, but I’m so indecisive on where to put them or which photos to go in them, that they’re still sitting. Crossing fingers I get over that and hang more this year. However, one project I did manage to accomplish was our hanging gallery wall in our living room.
Although this project was slightly frustrating in the beginning, (tip to prevent my frustration: get the heavy duty bolt cutter first!) I’m really happy with how it turned out. It brings great lines to the space and it’s simple enough to go with anything if we ever decide to change some of the other décor and furniture up.
Materials Needed
Square Gallery Frames – 2 different sizes. We got ours at West Elm.
Bolt Cutter (I ended up having to get a heavy duty one to do the job)
Decorative Knobs
Wall anchors that fit the screws that come with the knobs
Twine heavy enough to support the frames.
Scissors
Measuring tape
Level
Hammer
Pencil
Steps
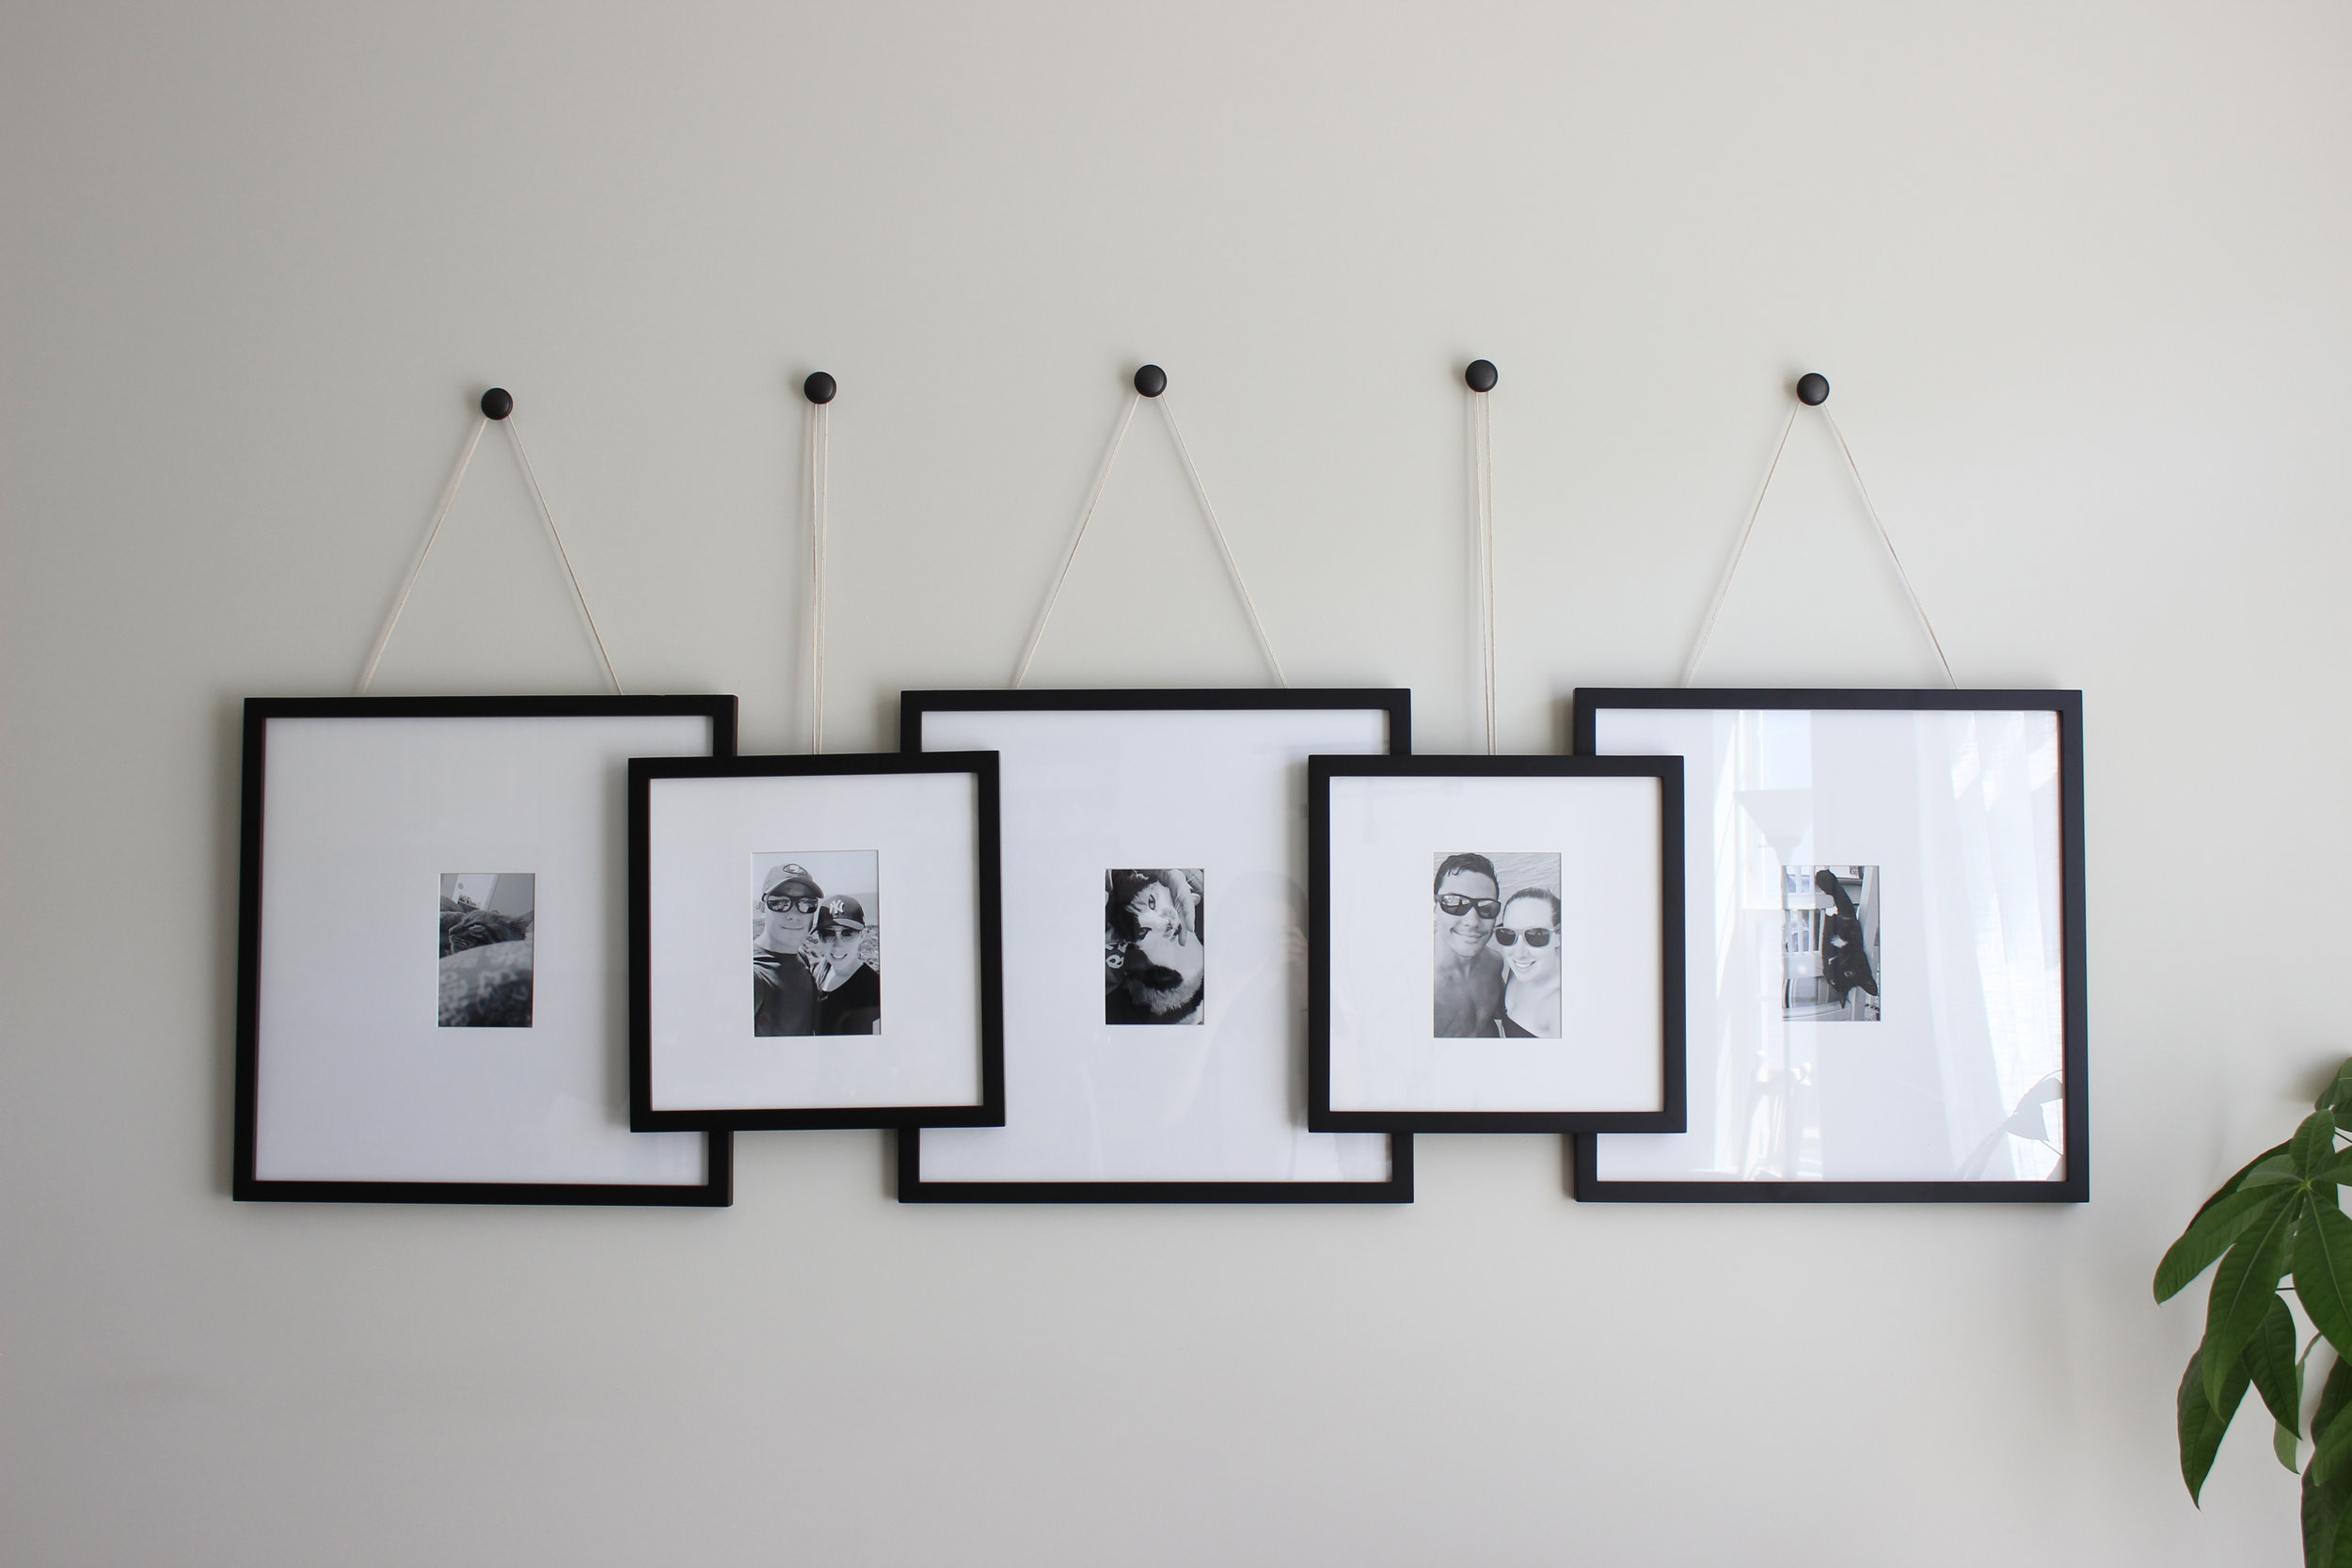
Measure out where you want to place the knobs. The easiest way to do this is to place your frames on the floor and space them out the way you like them (I placed three bigger frames on the back and two smaller ones up front). Measure out how far each knob should be from each other (mine were about a foot a part).
With your pencil, measuring tape, and level, mark up where you want the knobs on the wall. Use the level to ensure each mark is at the same height as the others (I did this by putting the level on top of my measuring tape and adjusting until each spot was level and equally separated). *This is easier with a partner, but if I can do it alone, so can you!
*Updated trick: you can also use wrapping paper (ideally the kind with the grid printed on the inside) and trace out the frames and the separation you want. Then hang the wrapping paper with a leveler on the wall (with painter’s tape) to help you mark out where you need to drill (I just partially hammer a nail into the wall at every mark). Rip off the wrapping paper, remove the nails and continue to step 3!.
Use your power drill to drill holes where you placed your marks. Your drill holes should be big enough for your anchors to fit into.
Hammer in your anchors. Buy some extras because I hammered a couple in too hard and broke them (my bad!).
Take the screws that came with the knobs. Use your heavy duty bolt cutter to cut off the head of each screw. I’ll admit, I had to get my husband’s help on this step.
Place the cut screws in your wall anchors and screw on your knobs so they’re flush to the wall and tight. *If the knobs are not flush, check to make sure the screw is all the way through the anchor or cut off more of the screw.
Measure out your twine using the first knob as your guide. This step might require a couple retries to get the length you want so don’t get frustrated. Once you nail down your ideal length, cut more twine at the same length for the other frames. Since I used two different sized frames, I had to measure out two different lengths for the twine to match and give the look more dimension.
Tie the twine to each frame’s hook and hang each frame on a knob. Use your leveler to ensure each frame hangs evenly and retie if you need to let out/give more twine to get everything even. It might take a lot of trial and error, but it’ll all come together.

Since our living room has a lot of black, white, and grey, I decided to put in black and white photos. To ensure all of the photos had the same black and white filter, I used the A Color Story app and used the “Audrey” filter in their B&W pack. Then I printed them at mpix!
Now, I just need some motivation to hang more pictures!
-J
Pin this project for later!